One of NetApp solutions I’m most excited about is SnapMirror active sync. SnapMirror active sync (which used to be called SnapMirror Business Continuity), allows you to set up asynchronous or synchronous protection for your Storage Virtual Machines (SVMs). So instead of replicating a individual volume, you’re instead replicating the logical construct that represents all the storage resources being used in your environment (so all the volumes, your storage configuration, your ONTAP users, etc.)
That’s pretty cool.
When we talk about DR (disaster recovery) solutions, I start thinking of solutions such as Broadcom’s Site Recovery Manager (now known as VMware Live Recovery). A typical failover would consist of:
- Power down your VMs on your primary site
- Break off site to site storage replication
- Make the destination storage read / writable
- Mount the destination storage to ESXi
- Power on VMs. Make sure your VMs start in the proper order.
- Have your application team start checking to make sure that applications have started properly
That’s a lot that has the potential to go wrong. You essentially have to shut your entire environment down to get it running on your alternate site.
With SnapMirror active sync:
- You should think of the volume / LUN at your primary and secondary sites as essentially the same.
- Traditionally, the storage admin thinks of their DR solution in terms of replication. For example:
- Write goes to a volume / LUN at the primary site
- SnapMirror in the backend replicates data to your secondary site via a incremental snapshot
- With SnapMirror active sync:
- Write goes to the volume /LUN at the primary site
- Before the write can be acknowledged, its replicated to the secondary site
- Both source and destination remain in lock step and can be considered the same LUN
As such you get stuff like:
- Hosts have multicluster multipathing. If your primary site blows up, you still have paths going to your secondary site. Your VMs can still access storage and your applications keep chugging along. In fact, your applications would have no clue that an entire site just disappeared
- You don’t have to touch your VMs or applications.
- You don’t even need to worry about SnapMirror, because once your primary site comes back up, SnapMirror active sync should automatically update, replicating any recent changes since the site was down, and return to a “In sync” state.
Of course, this isn’t just a VMware specific solution. SnapMirror active sync is certified for VMware vSphere Metro Storage Cluster (vMSC). But I anticipate seeing customers leverage SnapMirror active sync for other hypervisors and solutions (KVM, OpenShift, etc.)
Setup
I don’t want to duplicate documentation that is already out there. You have architectural diagrams. You have a inter-cluster latency prerequisite. You’ll need to set up a mediator using the ONTAP Mediator. There is definitely a need to design the overall solution.
Note: There is a inter-cluster requirement where latency round trip time (RTT) can be no more than 10 milliseconds. Which makes sense. Not every environment can meet that prerequisite, but if you already have that heavy investment in dedicated site to site links, Active Sync is really attractive.
Once you have the prerequisites in place, setting up SnapMirror active sync with vMSC is simple.
VMware vSphere Metro Storage Cluster Configuration
Do you have vSphere High Availability enabled? If so, you’re done with the vMSC setup
SnapMirror active sync Configuration
For this, you’ll need to download NetApp ONTAP Tools for VMware vSphere (OTV). This is NetApp plugin for the vSphere environment that allows you to do stuff like provision new datastores. And, configure SnapMirror active-sync protection.
Once you download and deploy OTV, register it to vCenter and add your Storage Systems via the user interface, you’re ready to set up SnapMirror active-sync protection.
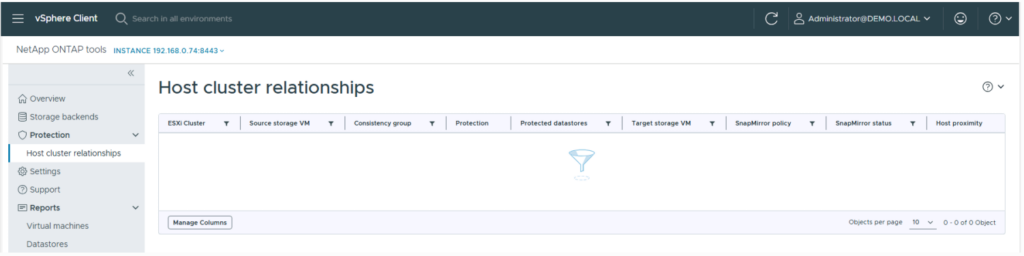
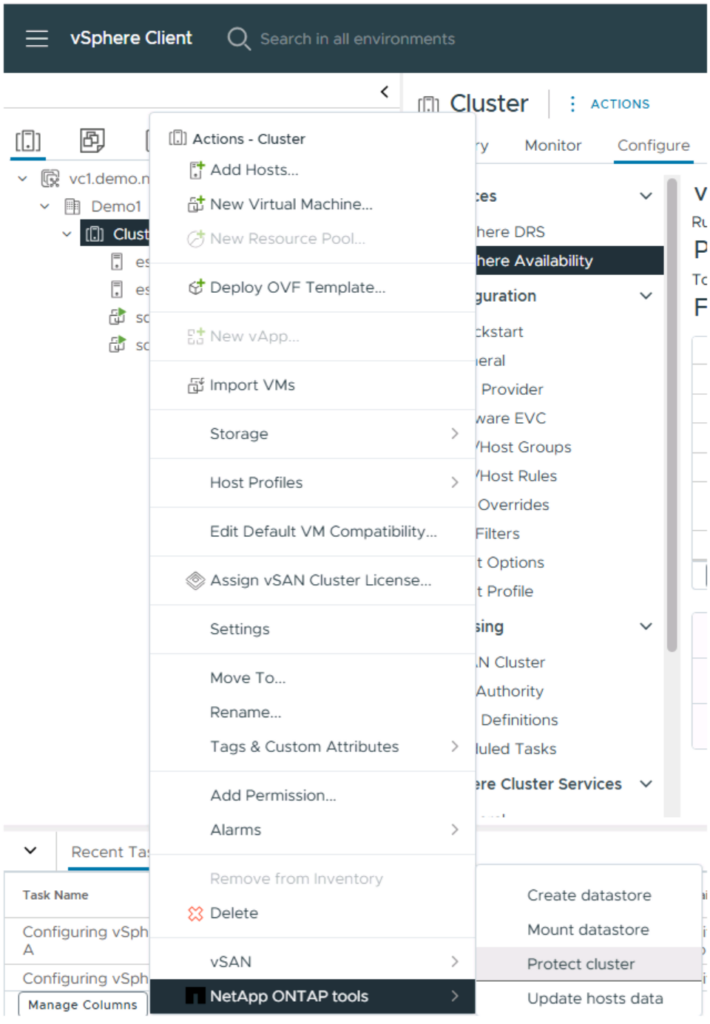
- Navigate to the OTV UI. Under Host cluster relationships is where we’ll see our configured SnapMirror active-sync protection once it’s configured
- Select the host cluster you wish to protect:
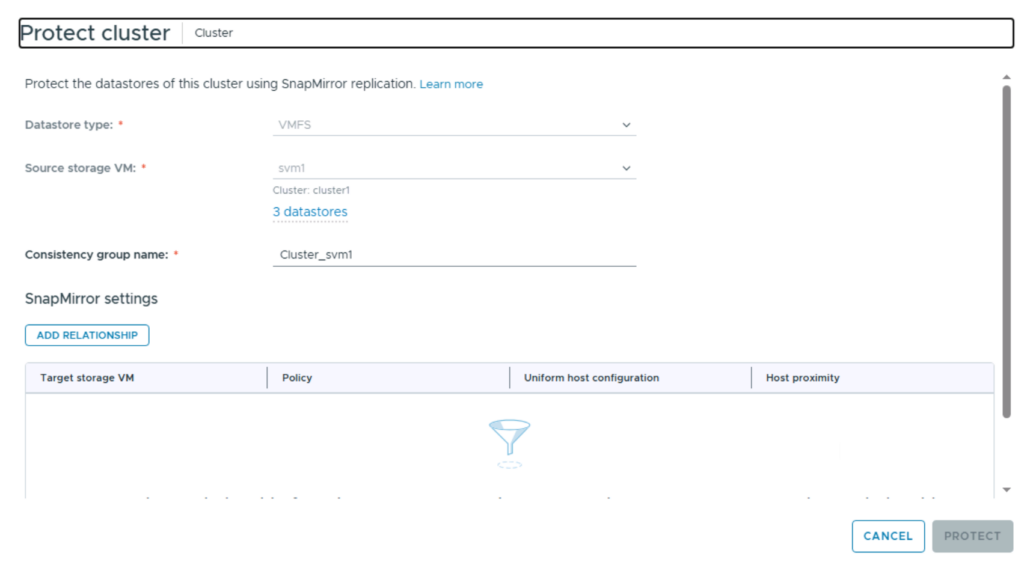
- In the Protect cluster pane, you need to give your consistency group a name. A consistency group is how ONTAP knows what volumes / LUNs need to be protected together.
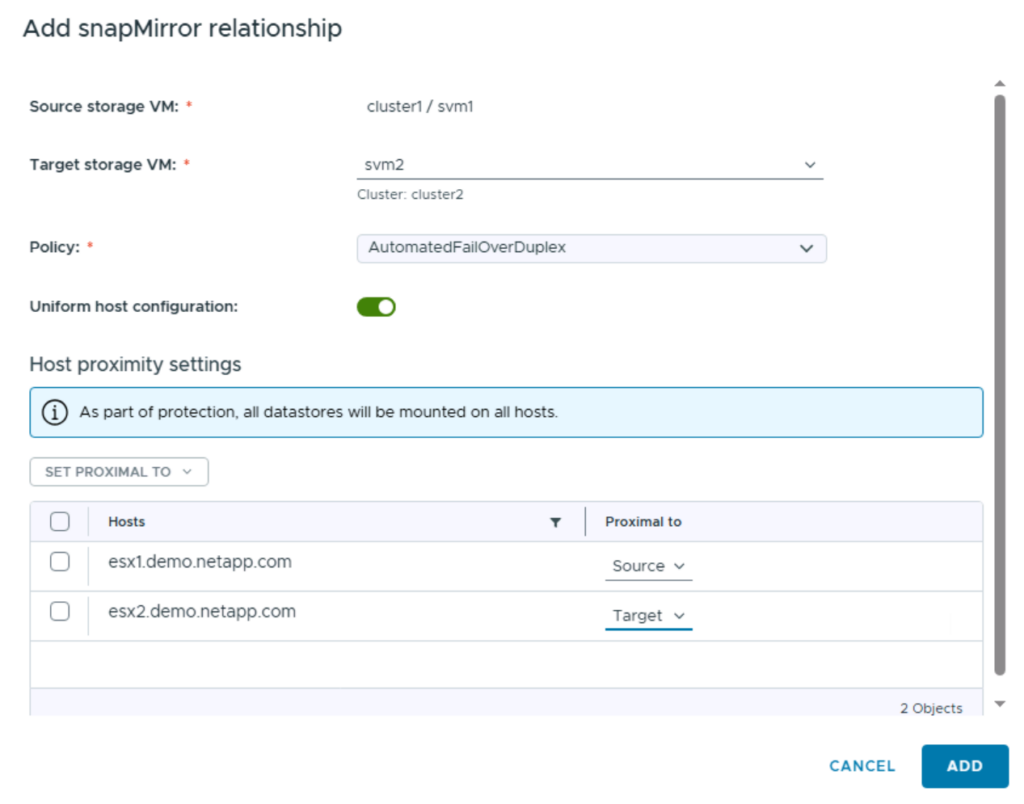
- Setup your SnapMirror active sync relationship. In the following example, I’m using ESX1 to represent my primary site. And ESX2 to represent my destination site
- Finish the setup wizard and let OTV configure the consistency group and snapmirror active sync relationship. Once done, you’ll see your protected host cluster listed in the OTV UI:

And you’re essentially done at this point.
If we take a look at one of our protected LUNs on ESXi, we see active paths to both the source NetApp array as well as the destination NetApp array:
[root@esx1:~] esxcfg-mpath -b
naa.600a0980774f6a352f3f59672f4e466b : NETAPP iSCSI Disk (naa.600a0980774f6a352f3f59672f4e466b)
vmhba65:C0:T1:L0 LUN:0 state:active iscsi Adapter: iqn.1998-01.com.vmware:esx1:619845978:65 Target: IQN=iqn.1992-08.com.netapp:sn.f300cd7a6c0011f0b397005056b06560:vs.2 Alias= Session=00023d000001 PortalTag=1028
vmhba65:C1:T1:L0 LUN:0 state:active iscsi Adapter: iqn.1998-01.com.vmware:esx1:619845978:65 Target: IQN=iqn.1992-08.com.netapp:sn.f300cd7a6c0011f0b397005056b06560:vs.2 Alias= Session=00023d000002 PortalTag=1029vmhba65:C0:T0:L0 LUN:0 state:active iscsi Adapter: iqn.1998-01.com.vmware:esx1:619845978:65 Target: IQN=iqn.1992-08.com.netapp:sn.a2967b366bff11f0ac5c005056b09199:vs.2 Alias= Session=00023d000001 PortalTag=1029
vmhba65:C1:T0:L0 LUN:0 state:active iscsi Adapter: iqn.1998-01.com.vmware:esx1:619845978:65 Target: IQN=iqn.1992-08.com.netapp:sn.a2967b366bff11f0ac5c005056b09199:vs.2 Alias= Session=00023d000002 PortalTag=1028
So I have a total of 4 paths. Two paths going to one storage array. Two paths going to my second storage array.
Takeaways
As someone who has been used to performing a Disaster Recovery using a product like Site Recovery Manager, SnapMirror active sync is really awesome.
Although I’m on the Support side of the fence now, I still remember the days of scheduling your annual DR test on a Saturday or Sunday. Failing over and making sure your VMs power on. Coordinating with the application support folks to make sure applications are up and working. And then failing everything back.
There is a lot to be said for having a failover event and having your application folks (or even your VMware team) be completely unaware.